Monthly Archives: November 2015

You are browsing the site archives by month.

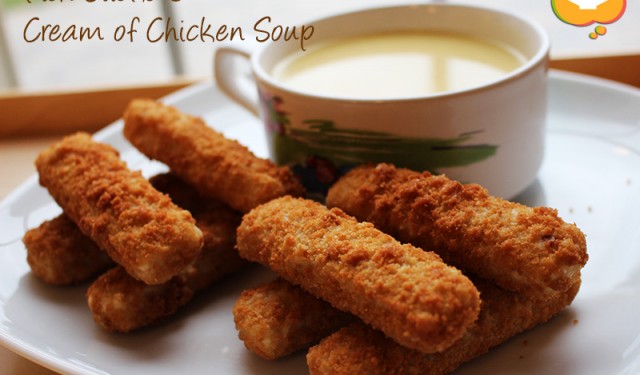
Fish Sticks and Cream of Chicken Soup

Fish Sticks & Cream of Chicken Soup

You would think fish sticks and cream of chicken soup were my childhood staples since I created a blog entry about them. On the contrary, these Memorable Dishes were special treats from my mom when she didn’t have time to make the multiple dishes that comprise every Chinese meal.

In Hong Kong, my mom worked full time and took care of my older brother and me at the time. Most people in Hong Kong do not own a car because it’s fairly expensive to maintain. Plus, the public transit system is amazing. Having said that, my mother still had to travel from one end of of the city to get to work and home by public transit. Everyday she would finish work, go to the market and buy fresh ingredients to cook us dinner. She did that EVERY evening. I don’t know how she did it because I can’t imagine anyone going to the market everyday on top of going to work full time. Not only did she cook us fresh meals every day, she cooked us several dishes including a soup. We always had fish, a meat dish, a vegetable dish, and steamed rice of course.

So every now and then when she was crunched for time, she would take shortcuts like every mom who tries to keep her sanity. When she didn’t have time to get fresh fish, she would bake us frozen fish sticks. I got super excited every time we got to eat this. I know it’s fried and frozen and not particularly healthy. But as a kid, we didn’t know that and it was such a special treat just to have fish sticks!

When she didn’t have enough time to make a soup, she would make a can of cream of chicken soup for us. Cream of mushroom soup either wasn’t available or not as popular as cream of chicken soup in Hong Kong at the time. Of course, I was also super excited about the cream of chicken soup too. My mom didn’t really whisk the soup until it was all smooth and creamy. So the soup would have pockets of creamy chunks which I liked drinking and smashing in my mouth.

This is to all moms out there – give yourself some slack! Don’t stress if you must make your kids frozen and processed foods from time to time. Even my full-time working mom who made dishes from scratch every evening took short cuts when she needed to 🙂Fish Sticks & Cream of Chicken Soup

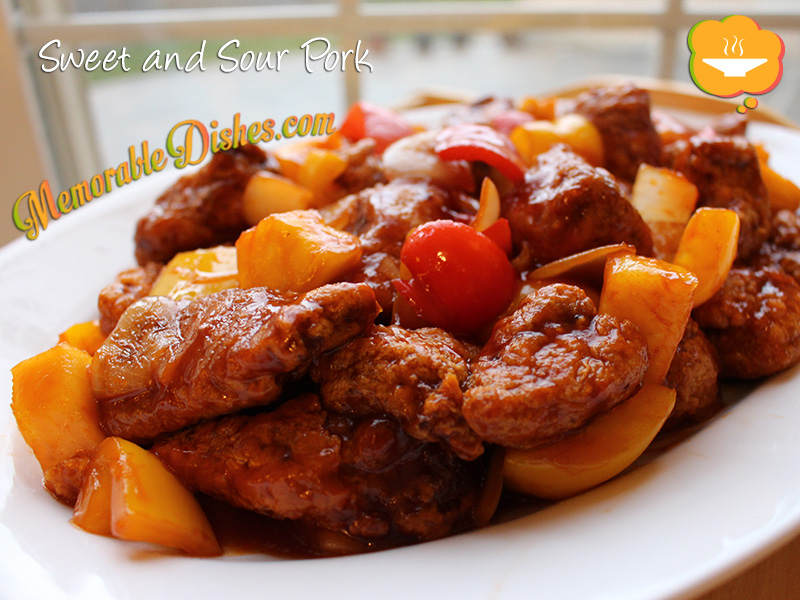
Sweet & Sour Pork

Sweet & Sour Pork

This Memorable Dish is another tribute to my husband. He loves sweet and sour pork. I would think most North Americans who eat Chinese food know about this dish and usually love it.

Believe it or not, this is NOT one of those dishes that was invented by North American Chinese, like chop suey. I believe sweet and sour pork is one of the most well known dishes in Chinese cuisine, both American/Canadian-Chinese and authentic Chinese restaurants alike.

My mom usually makes this for Sunday dinner when she has a bit more time because it’s a two-step process. First you have to deep fry the pork and then stir fry it with the sweet and sour sauce. I always find it a bit cumbersome to deep fry stuff at home. But alas, my mom does it because she enjoys making the food we like to eat.

This version of sweet and sour pork is based on my mom’s homemade version. Every Chinese family has their take on this dish and only certain Chinese restaurants make it well. Try my version but don’t forget to adjust the sweetness or sourness to your family’s liking.Sweet & Sour Pork

Sweet & Sour Pork

Prep Time: 20 minutes

Cook Time: 20 minutes

Total Time: 40 minutes

Serving Size: 4-6

Ingredients

  • 1 1/2 lbs Pork Butt (Shoulder), cut into 1 inch cubes
  • 1 tbsp of Soy Sauce
  • 1 tsp of Sugar
  • 1 tsp of Cornstarch
  • 1 tsp Shaoxing Wine or Cooking Wine
  • 1 small Onion, cut into large dice
  • 1 Pepper (green, red, orange or yellow), 1 inch pieces
  • 1 cup fresh or canned Pineapple,1 inch cube
  • 1/2 cup Ketchup
  • 1/2 cup Apple Cider Vinegar
  • 3 tbsp Sugar
  • 1 tbsp Soy Sauce
  • 1 Egg, beaten
  • 3/4 cup Cornstarch
  • Vegetable Oil for deep frying

Preparation

  1. Marinate pork with soy sauce, sugar, cornstarch, and cooking wine for at least 1 hour.
  2. In a small bowl, mix ketchup, vinegar, soy sauce and set aside.
  3. Preheat oil in a deep fryer or deep skillet to 375°F.
  4. Mix beaten egg with the marinated pork.
  5. Coat pork in cornstarch and shake off excess.
  6. Deep fry the pork until golden brown for about 5 minutes or until it floats.
  7. Make sure you don’t overcrowd the pork. Fry in batches if you’re not using a deep fryer with lots of oil.
  8. Once the pork pieces are done, place them on a plate lined with paper towel to absorb excess oil.
  9. In a wok or large skillet, heat up 1 tbsp of oil.
  10. Fry onions and green peppers until softened, then add ketchup mixture sauce.
  11. Once the sauce starts to boil, add the pineapples and stir.
  12. Put the pork in and mix until everything is coated.

Notes

Taste the ketchup mixture after you mix it. You might want to adjust the sweetness or sourness to your taste.

https://www.memorabledishes.com/sweet-sour-pork/

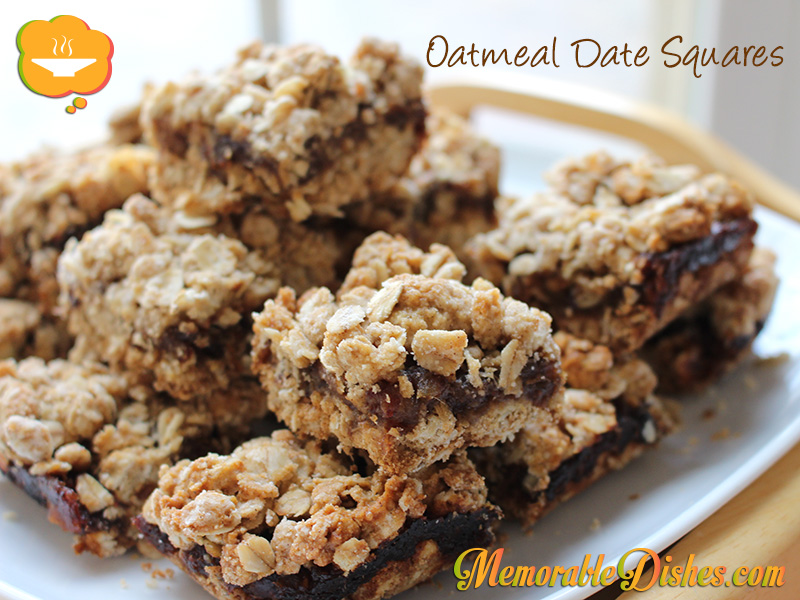
Oatmeal Date Squares

Oatmeal Date Squares

When I just had one child, I had all the time in the world—I organized play dates, matched outfits, and made homemade meals all the time. Instead of buying store-bought cookies and treats, I would bake homemade ones. I used to make oatmeal date squares and other treats for my oldest son all the time. I even experimented with making granola “balls”. That recipe was very time-consuming and involved rolling hot granola mixture into balls with my hands super speedily so that I didn’t burn myself 😛 Now that I have three children, I cannot leisurely bake as much anymore. But I still like to bake them semi-healthy treats as much as possible.

I haven’t made this Memorable Dish for awhile. While sifting through my printed recipes, I came across this one. The original recipe I found said to cook the dates with sugar but I found it unnecessary because the dates are sweet enough already. I cut down the amount of sugar from the original recipe to our family’s taste because I usually find baked goods recipes super sweet for me.

This oatmeal date squares recipe is fairly easy to make and a great nut-free snack to bring to school. Now with three children, I don’t know how long these oatmeal date squares will last! That’s why I cut them smaller to make them seem to last longer 😉Oatmeal Date Squares

Oatmeal Date Squares

Prep Time: 25 minutes

Cook Time: 35 minutes

Total Time: 1 hour

16 Squares

Ingredients

  • 1 1/2 cups pitted Dates, chopped
  • 3/4 cup Water
  • 1 1/2 cups Oats
  • 1 cup All-purpose Flour
  • 1/2 tsp baking soda
  • 1/4 tsp Cinnamon
  • 1/2 cup packed Brown Sugar
  • 1/4 tsp Salt
  • 1/3 cup Butter, melted
  • 1 Egg

Preparation

  1. Position rack in middle of oven. Preheat oven to 350°F.
  2. In a small pot, combine dates and water. Bring the liquid to a boil.
  3. Once the water comes to a boil, turn down heat and uncover pot.
  4. Cook date mixture for approximately 5 minutes or until it’s thickened.
  5. Stir and mash up dates while they’re cooking. Turn off heat once the liquid has evaporated.
  6. In large bowl, mix oats, flour, baking soda, cinnamon, brown sugar, and salt until combined.
  7. Stir in melted butter and egg until everything is blended.
  8. In a buttered 8-inch square pan, pat half of the oat mixture on the bottom.
  9. Spread the date mixture onto the oat mixture carefully.
  10. Then gently pat the remaining oat mixture over the date mixture.
  11. Bake for 20-30 minutes or until lightly brown.
  12. Cool on a rack and cut into squares.

Notes

If I remember and have time, I bake the squares for 15 minutes and then rotate the pan and bake for another 15 minutes. This helps to cook it evenly.

https://www.memorabledishes.com/oatmeal-date-squares/

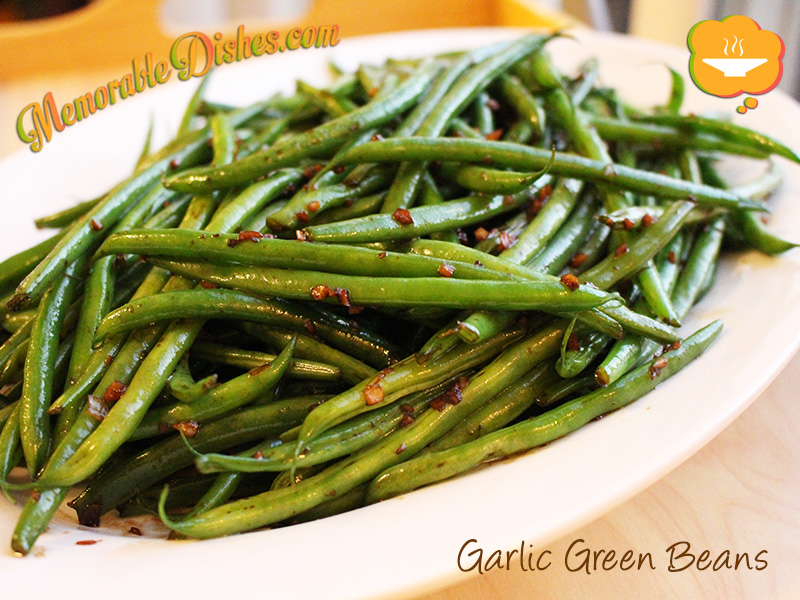
Garlic Green Beans

Garlic Green Beans

My kids insisted that I put this on my Memorable Dishes blog. They absolutely LOVE this dish. In fact, they said these garlic green beans were even better than French fries! I think they were just pulling my leg and trying to butter me up for something they want later 😉 Already, at such a young age, they’ve learned to subdue me with their sugary words…

I remember the days when the boys were not that much into vegetables. Persuading them to eat their veggies was like pulling teeth. Then when I least expected it, they were trying new vegetables! Maybe all the brainwashing horror stories I told them about not eating their veggies finally got to them 😉 I remember distinctly the first time they ate this vegetable. It was at a holiday potluck dinner with friends. We were waiting for other foods to finish cooking or heating up. The boys were super hungry so I told them to eat the garlic green beans our friends brought. I was expecting to hear moans and groans and thought to myself, they’re not going to eat them. I gave it a shot anyway and….lo and behold they ate them without any struggle! In fact, they actually embraced eating them.

I asked my friends what they put in it and all they said was garlic and butter. Since then, I started making this at home and every time they’ve loved it. Recently, I’ve added my own Asian twist to it and use soy sauce instead. Not just your regular soy sauce, mind you, but a good premium soy sauce. That took the green beans to a whole another level and that was when they said it tasted better than French fries.

I never would have thought simple garlic green beans with soy sauce could turn into a Memorable Dish. The trick is to cook the green beans to your liking. Our family likes it with a bit of a crunch to them. If you are able to find the French green beans (which are thinner), they are even better.Garlic Green Beans

Garlic Green Beans

Prep Time: 10 minutes

Cook Time: 10 minutes

Total Time: 20 minutes

Ingredients

  • 1 1/2 lb Green Beans
  • Water for boiling beans
  • Salt for boiling beans
  • 2 tbsp Vegetable Oil
  • 6 cloves Garlic, minced
  • 2 tbsp Soy Sauce

Preparation

  1. Bring water to a boil and add enough salt until you can taste it.
  2. Put green beans in boiling water. Once the water starts to boil again, drain the green beans and set aside.
  3. Heat oil in a wok or large frying pan.
  4. Add garlic and green beans and stir-fry for a few minutes until heated through.
  5. Add soy sauce and stir-fry until soy sauce is coated on all the beans.

Notes

If you end up overboiling the green beans, put them in an ice bath and drain.

https://www.memorabledishes.com/garlic-green-beans/

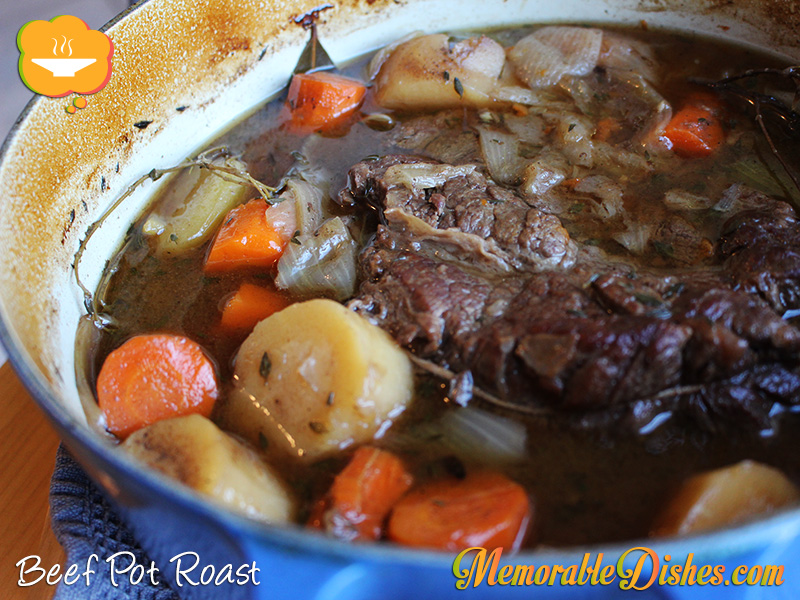
Beef Pot Roast

Beef Pot Roast

This is a comfort food for lots of people who’ve grown up in North America. It also happens to be one of my husband’s favourite Memorable Dishes made from his paternal grandmother. He’s the first to admit that she’s not as good of a cook as his maternal grandmother but nonetheless, her beef pot roast brings back sweet childhood memories. Just add a side of corn and you have a perfect meal to suit every kid’s taste. Soft tender beef and sweet kernels of corn. He remembers she always used to make corn to go with this dish.

Even though I didn’t grow up eating this Memorable Dish, I can feel how comforting eating this pot roast can be. Especially on a chilly day, I crave for hearty and saucy meals. The kids really enjoyed this dish and even my baby girl wanted more of it. I think the tender meaty goodness really ignites her palate and warms up her big belly 🙂

This pot roast might not be the same as my husband’s grandmother’s recipe, but he definitely enjoyed it. If you want the beef to be more tender, just cook it longer. This is a great leftover dish and tastes even better the next day!Beef Pot Roast

Beef Pot Roast

Prep Time: 20 minutes

Cook Time: 3 hours

Total Time: 3 hours, 20 minutes

Serving Size: 6

Ingredients

  • 1 Beef Pot Roast (approximately 3 pounds)
  • 2 Onions cut into quarters
  • 4 cloves Garlic, whole
  • 2 Carrots cut into 2-inch pieces
  • 2 Parsnips cut into 2-inch pieces
  • 2 Celery stalks cut into 2-inch pieces
  • 2 large Potatoes cut into large chunks
  • 2-3 sprigs Thyme
  • 1 Bay Leaf
  • 2 tbsp vegetable oil
  • Salt & Pepper
  • 4 cups Beef Broth

Preparation

  1. Preheat the oven to 325 degrees F.
  2. Pat roast dry and sprinkle it generously with salt and pepper.
  3. Heat oil in Dutch oven and brown all sides of the roast. Set aside.
  4. In the same pot, add onions and garlic.
  5. Deglaze the pot with beef broth and scrape the bottom of the pot.
  6. Put roast back into the pot and add the rest of the vegetables, thyme and bay leaf.
  7. Bring liquid back to a boil.
  8. Taste the broth and add more salt if needed. (Remember the meat and vegetables are going to absorb the salt and if it’s not salted enough, it’s going to taste bland once it’s cooked.)
  9. Cover Dutch oven and bake in the oven for 2 1/2 to 3 hours until beef is tender.
  10. Serve with crusty bread and if you’re Asian, serve with rice 🙂
https://www.memorabledishes.com/beef-pot-roast/


Show Buttons
Hide Buttons