Portuguese Curry Chicken
(葡國雞)

Portuguese Curry Chicken

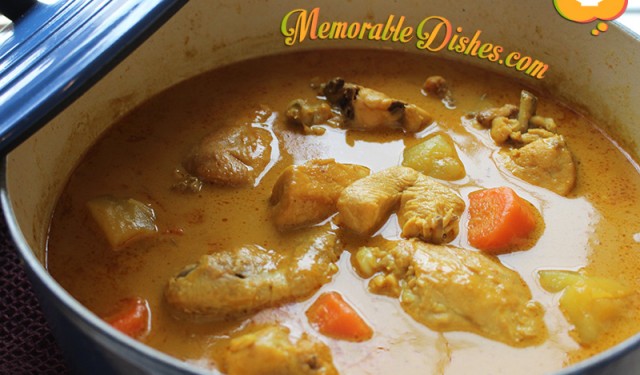
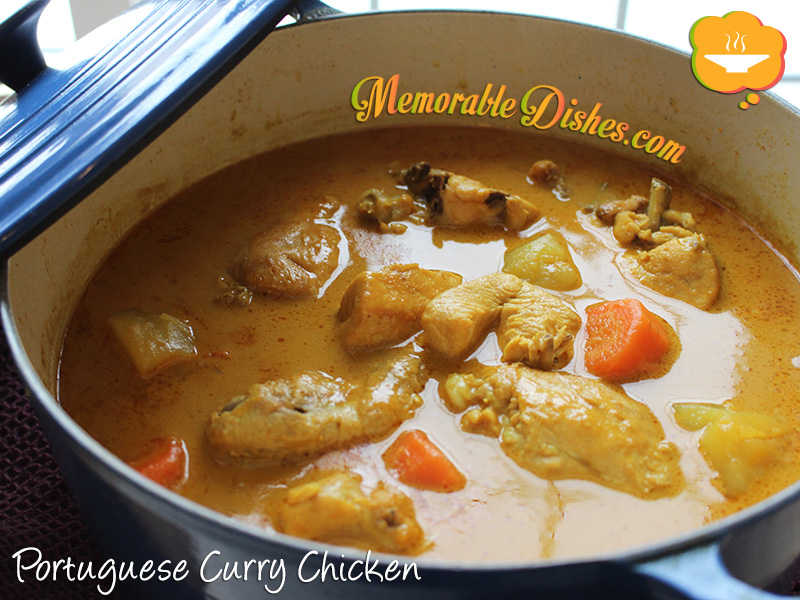
The name of this dish is a misnomer. This dish does not originate from anywhere in Portugal. And curry is definitely not part of Portuguese cuisine. This is actually a Macanese dish that emerged when Portugal colonized Macau. (Macau is about an hour ferry ride west of Hong Kong). This coconut milk-based curry is popular among Hong Kong people because it’s not as hot and spicy as other curries. The coconut milk neutralizes the curry and gives it a milder taste.

My husband and I LOVE spicy food! Having young kids means that we cannot indulge this craving very often. So when I make spicy food or curry at home, I always make a non-spicy dish for the kids. Believe it or not, curry chicken has become my oldest son’s favourite dish! When he claimed the love for this dish he was around five or six years old. Before that, he went through a time of picky eating where he ate only carbs or things without sauce.

One evening when I made curry, my oldest son actually asked to try it. (At that time, he was still going through his picky phase.) We were shocked at his request and of course didn’t want to deter him by saying, “This is too spicy for you!” Instead, we gave him some of our curry chicken, waited anxiously, and were half afraid he would spit it out. But alas, he said, “Yum! I like it!” Our mouths dropped and we gave him some more. That was the beginning of my son’s love of curry. He would actually eat it and gulp down water after every bite. He likes it even though it’s too spicy for him!

As my son grows older, I hope this will become one of his favourite childhood Memorable Dishes. Every time I make this dish, I think of him and how much he enjoys eating it. One bite of curry chicken. One gulp of water 😛

Portuguese Curry Chicken

Portuguese Curry Chicken (葡國雞)

Prep Time: 20 hours

Cook Time: 1 hour

Total Time: 1 hour, 20 minutes

Serving Size: 4-6

Ingredients

  • 1 Chicken whole (approximately 4 pounds)
  • 1 Onion cut into chunks
  • 4 cloves Garlic minced
  • 2 Carrots cut into chunks
  • 2 large Potatoes cut into chunks
  • 2 tbsp vegetable oil
  • 1 tbsp Kosher Salt
  • 3 tbsp Curry Powder
  • 1 can Coconut Milk (398 mL)
  • 2-3 cups Water
  • 1 Bay Leaf

Preparation

  1. Cut the chicken into serving size pieces and trim any excess fat.
  2. Salt the chicken with half of the salt.
  3. Heat oil in braising pot, such as a Dutch oven and lightly brown chicken. The chicken only needs to be browned a bit and doesn’t need to be cooked through. Set aside.
  4. Lower to medium heat. (If there’s too much residual oil left from the chicken skin fat, take some oil out.) In the same pot, add onions to brown until they are softened, about 5-10 minutes.
  5. Then add garlic and curry powder and mix.
  6. Pour in coconut milk and water. (You might want to reserve some of the water until you put all the chicken and vegetables into the pot. The liquid should just cover the meat and vegetables.)
  7. Scrape off brown bits that are stuck to the bottom of the pot.
  8. Put the browned chicken, carrots, and potatoes back into the pot.
  9. Once you bring it back to a simmer, lower heat, cover and simmer.
  10. After 20 minutes, stir the chicken and make sure nothing gets stuck to the bottom.
  11. Cook for another 20 minutes.
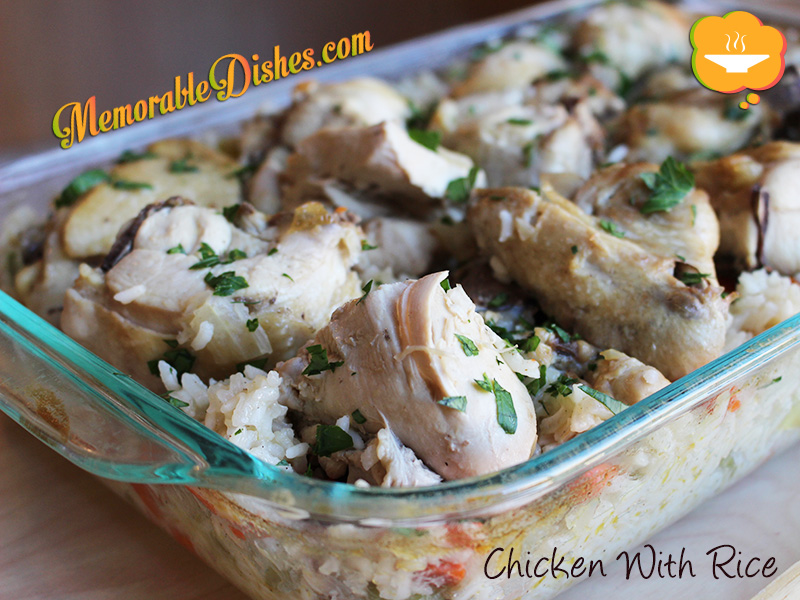
  12. Serve over a bed of steamed rice if desired.

Notes

Note #1: To avoid added fat, I skin all the chicken before browning it. It’s up to your family’s preference 🙂

Note #2: If you don’t want to use a whole chicken, you can use your favourite chicken parts. Chicken thighs and legs give the most flavour. Chicken breasts tend to be drier. For best results, leave all meats on the bone for stewing.

https://www.memorabledishes.com/portuguese-curry-chicken/

Mapo Tofu (麻婆豆腐)

Mapo Tofu

Mapo tofu – a staple childhood favourite for Chinese children. My cousin reminded me of this dish as one of her childhood favourites. I remember eating it as a kid and now make it often for my kids. My second son absolutely LOVES tofu! Hence, this is one of his favourite Memorable Dishes!

Mapo tofu derives from Sichuan province of China which is a region known for its spicy food. The version my mom used to make was not spicy at all. As the dish travels from the northern part of China to the south, it becomes milder for the southerner’s taste.

You don’t have to be Chinese to love this dish. It’s such a versatile and easy dish to make. Everyone in my family loves it! Kids love it because it’s saucy and goes well with rice. Old people love it because it’s soft and they don’t have to chew as much 😉

Just to let you know this isn’t an authentic version of Mapo Tofu. It’s a homemade version geared towards kids. Now that my kids are older and enjoy spicy food, I add a bit of chili bean sauce AKA Doubanjiang. You can add as much or as little chili bean sauce as you want or omit it altogether to suit your family’s taste. This Memorable Dish can become a staple in your repertoire of dishes to make for your family.

Mapo Tofu

Mapo Tofu (麻婆豆腐)

Prep Time: 15 minutes

Cook Time: 15 minutes

Total Time: 30 minutes

Serving Size: 4

Ingredients

  • 1 pound of Ground Pork
  • 1 tbsp of low sodium Soy Sauce
  • 1/2 tsp of Sugar
  • 1/2 tsp of Cornstarch
  • 1 tsp of Sesame Oil
  • 1 tbsp of Water
  • 1 tbsp of minced Garlic
  • ½ tbsp of grated Ginger
  • 1 package (530 grams) of tofu, cut into ½ inch cubes
  • 1 tbsp of Vegetable Oil
  • 1 tbsp of Oyster Sauce
  • 1 tbsp of Chili Bean Sauce AKA Doubanjiang (optional)
  • ½ cup water or chicken stock
  • 1 sliced Green Onion for garnish
  • To thicken sauce
  • 1 tsp cornstarch
  • 1 tbsp water

Preparation

  1. Marinate pork with soy sauce, sugar, cornstarch, sesame oil and water for at least 30 minutes.
  2. If you marinate the pork in the fridge, make sure you bring it back to room temperature before cooking it for best results.
  3. Heat oil in a wok or a large frying pan.
  4. Add garlic and ginger and pork. Sauté until it is done.
  5. Stir in oyster sauce, water or chicken stock and chili bean sauce (if using).
  6. Gently put the cubed tofu into the meat mixture. Stir until it’s heated through.
  7. Mix 1 tsp cornstarch and 1 tbsp water in a bowl.
  8. Then add the cornstarch solution into meat and tofu mixture.
  9. Cook until everything thickens.
  10. Garnish with sliced green onions.
  11. Serve with steamed rice.

Notes

I like using the soft tofu but if you like a harder texture, use medium to firm tofu.

https://www.memorabledishes.com/mapo-tofu/

Spam Fried Rice

Spam Fried Rice

Spam – what can I say about it? For some, it is a deceptively tasty can of meat. For others, it is the antichrist of meat products. Whether you love it or loathe it, Spam is a Memorable Dish for everyone because everyone has an opinion about it.

I never knew that Spam was a food to be made fun of until I moved to North America. In Hong Kong, we consider Spam a meat staple. There are Spam and egg sandwiches, Spam in macaroni soup, Spam on top of ramen noodles, and Spam fried rice. The list of food made from Spam is endless.

Even though Spam is the butt of many jokes in North America (except in Hawaii where they LOVE Spam), I think most people secretly enjoy eating it. Some of my friends always bring Spam when they go camping. They insist they only eat it when camping because it’s easy to pack and doesn’t need refrigeration. Perhaps they use camping as an excuse to indulge in their innermost desires of Spam eating without the guilt? 😉

What makes this a Memorable Dish for me is that my mom used to make us Spam Fried Rice as kids. North Americans have their macaroni and cheese and we have our Spam Fried Rice, or any fried rice for that matter. But I fondly remember her Spam Fried Rice. Now that we are more health conscious, she hasn’t used Spam for fried rice as much. She uses ham or chicken or whatever leftover meats she has on hand.

I am continuing the family tradition of making fried rice for the kiddies. Most of the time, I use real meat (not that Spam is not “real” meat…haha). But sometimes when I feel nostalgic and want to live life on the edge, I make Spam Fried Rice.

Just like me, the kids can’t stop eating just one bowl of fried rice. If you end up making this recipe, please enjoy and indulge! I don’t pig out on Spam all the time (pun intended). So, no guilt is allowed when eating Spam Fried Rice, ok? 🙂 On that note, here’s my recipe for Spam Fried Rice. Now that Spam Lite is available, I’m using that instead. Healthier Spam – how ironic!

img_Spam_Fried_Rice

Spam Fried Rice

Prep Time: 15 minutes

Cook Time: 15 minutes

Total Time: 30 minutes

Serving Size: 4

Ingredients

  • 5 cups of day-old Cooked Rice (2 cups of uncooked rice)
  • 1 can of diced Spam (I use the low-fat version.)
  • 2 cups of frozen Peas, Carrots, Corn (thawed)
  • 3 large beaten Eggs
  • Vegetable Oil (1 tsp for eggs, 3 tsp for rice)
  • ½ tsp Salt
  • 1 tsp Garlic Powder
  • ¼ cup low sodium Soy Sauce
  • 1 sliced Green Onion for garnish

Preparation

  1. Heat 1 tsp of oil in a non-stick wok or large frying pan.
  2. Scramble the eggs and set aside.
  3. Using the same wok, fry up the Spam until lightly brown and crispy on the outside. (You don’t need to use oil because there’s enough fat in the Spam.) Drain out the oil and set aside.
  4. Heat 3 tsp of oil and stir fry the rice until it’s heated through.
  5. When the rice turns a bit crispy, add the salt, garlic powder, and soy sauce.
  6. Stir fry the rice a bit more until the soy sauce is mixed in the rice.
  7. Put the Spam, eggs, and vegetables with the rice.
  8. Stir fry all the ingredients until they are evenly mixed.
  9. Garnish with sliced green onions.

Notes

If you don’t have any day-old rice, cook the rice and cool it in the fridge before making the fried rice for best results. Basically, the rice has to be a bit on the dryer side.

https://www.memorabledishes.com/spam-fried-rice/

Perfect Roast Chicken

Perfect Roast Chicken

Roast chicken, I’m sure, is a Memorable Dish for a lot of people. Grandma’s or mother’s roast chicken certainly evokes the childhood memories of simpler days. In today’s busy world, this simple dish has reserved itself as a weekend meal, perhaps as a Sunday family dinner.

It’s such a simple dish, but there are so many little tricks needed to cook it perfectly. I’ve made roast chicken dozens of times. Sometimes I undercook it and other times I overcook it. I’ve followed recipes from reputable cookbooks to no avail. One recipe said to cook the chicken for 425 degrees for 1 ½ hours. I did it a few times and the results were not always favourable.

However, I think I have finally uncovered the secrets of cooking the perfect roast chicken! One cold winter’s day I was looking for fresh thyme to use for my roast chicken. I couldn’t find it at this particular local grocery store but I didn’t bother going to another store. I ended up perusing the herb aisle to see what I could use – poultry seasoning! I always hear TV chefs talk about poultry seasoning but have never used it. Since there was no fresh thyme available, I gave poultry seasoning a try. When I got home, I was a little skeptical about using it. It smelled like Chinese herbal medicine – not very appetizing 😛 I gave it a try anyways. TV chefs can’t be wrong, right? After the chicken was cooked, the herbal seasoning mellowed out and permeated into the meat of the chicken. It was mighty tasty! Don’t forget I also put butter beneath the skin and on top to make it crunchy and tasty. If you don’t have poultry seasoning, you can always just use salt, pepper and garlic powder.

My whole family devoured the chicken and I even got a “I love you” from my little one for making the chicken. I hope you give my roast chicken recipe a try and build your own family food memories. If you have any new tips and tricks after trying out my recipe, feel free to comment and share. I would love to hear how your roast chicken turns out 🙂

Perfect Roast Chicken

Perfect Roast Chicken

Prep Time: 15 minutes

Cook Time: 2 hours, 15 minutes

Total Time: 2 hours, 30 minutes

Serving Size: 4-6

Ingredients

  • 1 Chicken whole (approximately 4 pounds)
  • 1 Onion quartered
  • 2 Carrots cut into thick slices
  • ½ cup dry White Wine or Chicken Stock
  • 1 tbsp softened Butter
  • 1 tbsp melted Butter
  • 1 tbsp Kosher Salt
  • ½ tsp Pepper
  • 1 tsp Garlic Powder
  • 1 tsp Poultry Seasoning
  • For Gravy
  • 2 tbsp Chicken Fat or Butter
  • 2 tbsp Flour
  • 1 ½ to 2 cups Chicken Stock (depends on how thick you like your gravy)

Preparation

  1. Preheat oven to 350°F.
  2. Put carrots, onions, and wine/chicken stock in roasting pan/glass baking dish.
  3. Rinse and pat dry chicken with paper towels.
  4. Mix salt, pepper, garlic powder and poultry seasoning in a small bowl. Set aside.
  5. Spread softened butter underneath the skin of chicken breast and brush melted butter all over chicken.
  6. Sprinkle herb and salt mixture inside cavity and all over chicken.
  7. Place chicken in roasting pan, breast side up.
  8. Roast chicken for approximately 2 hours.
  9. The chicken is done when its internal temperature reaches 165°F. Check by inserting an instant food thermometer to the thickest part of the chicken, the thigh, without touching the bone. When the juice runs clear, it’s done.
  10. Rest the chicken by covering it with foil while you make the gravy.
  11. For Gravy Preparation
  12. Make a roux by cooking the chicken fat/butter with flour in a small pot over medium heat.
  13. Once it’s mixed into a thick paste and the flour smell is gone, slowly add the chicken stock.
  14. Stir and mix with a whisk to avoid lumps.
  15. Bring it to a simmer until it thickens.
  16. If desired, add drippings from roasted chicken.

Notes

Note #1: My package of poultry seasoning is made up of thyme, sage, marjoram, rosemary, black pepper, and nutmeg. If you don’t have poultry seasoning, you can use the herbs you have on hand.

Note #2: If you have time and want to cook the chicken more evenly, baste the chicken with drippings from the pan every 30 minutes. (If you don’t have a baster, use a silicone pastry brush to baste.) After basting, rotate roasting pan 180 degrees and continue roasting.

https://www.memorabledishes.com/perfect-roast-chicken/

Chicken With Rice
(Kokoshka Sou Oris)

Chicken (Kokoshka) With (Sou) Rice (Oris) is one of my favourite Memorable Dishes from my husband’s family. When we first started dating, this is one of the dishes I had at my in-laws. It’s not a fancy dish by any means but I really enjoyed eating it every time. Even though we are from totally different backgrounds (me being Chinese and him being Macedonian), we find that lots of our values are very similar. Our family’s love of food is definitely one of them. Yes – I consider that a value! I always say to my husband, “Thank goodness you like to eat and try new foods as much as I do!” I believe our relationship has lasted because we share the same value for food 😉

When we got married, my mother-in-law bought me the “official” Macedonian recipe book. It’s a plastic-coiled bound book with a red cover that says, “Traditional Macedonian Recipes.” Mine is a revised edition with 40 additional recipes. It seems like everyone in the Macedonian community has one version or another. The book also includes a bit of Macedonian history and a map, which is very interesting to me. I also love that in each section, there’s a little anecdote that talks about the recipes and the importance of them to the Macedonian community.

The first time I cooked this dish from the recipe book, it didn’t turn out the same as my mother-in-law’s. When I told her about my blunder, she looked at the recipe and said that it wasn’t the same way she cooked this dish. This reiterated the line that I read from the cookbook, “In collecting the recipes, we did not find two women who made the same dish in exactly the same manner.” Go figure!

I find it very comforting when cooking this recipe. The smell of chopped onions, celery and carrots permeates my nose and into my mind. Even though I have never been to my husband’s Macedonian village before, I could picture hardworking mothers taking care of their families and cooking up a nice meal after a hard day’s work at the farm.

I used the Macedonian cookbook’s recipe as a base and adjusted the way I cook it for my family. The kids gobble up this dish every time I make it. Lovingly, they really enjoy this Macedonian dish made by their Chinese mother 🙂

Chicken With Rice (Kokoshka Sou Oris)

Chicken With Rice
(Kokoshka Sou Oris)

Prep Time: 20 minutes

Cook Time: 1 hour, 10 minutes

Total Time: 1 hour, 30 minutes

Serving Size: 4

Ingredients

  • (For Chicken Broth)
  • 1 Chicken whole (approximately 4 pounds)
  • 1 Celery stalk with leaves, halved
  • 1 Onion, halved
  • 1 Bay Leaf
  • 1 tsp Salt
  • 10 cups of Water for boiling
  • (For Chicken Rice Dish)
  • 3 tsp Olive Oil
  • 1 medium diced Onion
  • 2 diced Celery stalks
  • 2 diced Carrots
  • 2 cups of long grain Rice
  • 1 tsp Salt
  • ½ tsp Pepper
  • 4 cups Chicken Broth (from the boiled chicken)
  • Chopped Parsley for garnish

Preparation

  1. Cut the chicken into serving size pieces and trim any excess fat.
  2. Place chicken, celery, onion, bay leaf and 1 tsp salt in large pot and cover with water.
  3. Bring the water to a boil and skim any scum and fat floating on top.
  4. Turn down to medium low heat and simmer for 45 minutes.
  5. Once it’s done, set chicken aside from broth.
  6. For Rice Preparation
  7. Preheat oven to 375°F.
  8. Heat olive oil in large frying pan.
  9. Sauté onions, celery and carrots over medium heat until soft (about 5-10 minutes).
  10. Add rice, chicken broth, salt, and pepper into the vegetables and mix.
  11. Bring liquid back to a boil and turn off heat.
  12. Put rice mixture in a baking dish and place chicken on top.
  13. Bake at 375°F for 15 minutes.
  14. Cover with foil or lid and let it stand until all liquid is absorbed.
  15. Garnish with parsley.

Notes

Note #1: You can blanch the chicken pieces before boiling them to eliminate most of the scum.

Note #2: If rice is too dry for your liking, add some extra broth and then cover for a few more minutes.

https://www.memorabledishes.com/chicken-with-rice/

Condensed Milk Bread

Condensed Milk Bread

I don’t know if it’s a Hong Kong British thing but when I was growing up my grandmother used to spread condensed milk on top of white bread for us to eat. We would have it for breakfast or as a snack. Nowadays, it would be considered an unhealthy snack let alone a breakfast for kids! Sweetened condensed milk full of sugar on top of white bread – the horror! I’m surprised my older brother and I weren’t bouncing off the walls nor obese despite this fairly frequent indulgence.

I did a quick search online for condensed milk bread and saw that others have created the same treat! Here, the author called it condensed milk toast and got the recipe from Rachel Ray magazine. They both used fancy brioche toast. My grandmother just spread the condensed milk on top of plain soft, fluffy, untoasted white bread bought from an Asian-Western style bakery.

Not only was this condensed milk bread the best thing ever, but my grandmother also created another treat out of the condensed milk. There was no way we could finish a whole can of condensed milk spread on bread in one sitting (or could we? 😉 ) She would pour the leftover can of condensed milk into a glass jar and store it in the fridge. It was impossible to scrape off all the residual thick condensed milk still stuck inside of the can. So my resourceful grandmother put boiling water inside the can and swished it around. And voilà! Condensed milk as a drink! I think I loved this sweetened milk drink more than the bread itself.

This is one of those Memorable Dishes that is so simple yet brings back the fondest of memories. I don’t buy condensed milk very often. But every time I see a can of it at the grocery store I think of my grandmother’s condensed milk bread and drink.

Condensed Milk Bread

Condensed Milk Bread

Prep Time: 5 minutes

Total Time: 5 minutes

4

Serving Size: 4

Ingredients

  • 4 slices of White Bread (If possible, get it from an Asian-Western style bakery.)
  • 1 can of Condensed Milk

Preparation

  1. Spread the condensed milk on bread and enjoy!
  2. For Condensed Milk Drink Preparation
  3. Pour leftover condensed milk in a glass jar and refrigerate.
  4. Pour boiled hot/warm water in the condensed milk can, filling half of the can only.
  5. Scrape the sides of the can and stir with a spoon.
  6. Pour diluted milk into a cup and fill the cup with more water.
  7. Add more condensed milk into cup to taste.
  8. Stir and enjoy!
https://www.memorabledishes.com/condensed-milk-bread/

Minced Beef and Egg with Rice
(窩蛋免治牛肉飯)

Minced Beef and Egg with Rice

Eating this rice dish brought back memories of weekend lunches in Hong Kong when I was a kid. Almost every weekend, our family went out for dim sum. My father is an avid rice eater, which means he needs to eat rice at every meal or else all hell would break loose! If he absolutely cannot eat rice at a particular meal, noodles or pasta would suffice.

If you are familiar with dim sum, you know that it consists of small morsels of meat or dumplings. I think my father doesn’t feel truly full unless he has eaten rice. So our dim sum outings would always end up with him ordering a rice dish. In most cases, it would be Minced Beef and Egg with Rice.

This dish appears in most Chinese restaurants’ menu as “Raw Egg with Minced Beef Rice”. Yes, the egg is raw! The waiter brings the raw egg to the table and cracks it into the beef mixture right in front of you. You then mix the raw egg with the beef and rice. The hot temperature of the beef and rice cooks the egg a little but it remains mostly raw. The egg gives the dish a silky finish that I love.

Every time I eat this Memorable Dish, it reminds me of how obsessed my father is over eating rice. This restaurant-style dish is very easy to recreate at home. My whole family, including the kids, love it! I think this dish is becoming one of my kids’ most Memorable Dishes.

Minced Beef and Egg with Rice

Minced Beef and Egg with Rice
(窩蛋免治牛肉飯)

Prep Time: 15 minutes

Cook Time: 10 minutes

Total Time: 25 minutes

Serving Size: 4-6

Ingredients

  • 2 pounds of Ground Beef
  • 2 tbsp of low sodium Soy Sauce
  • 1 tsp of Sugar
  • 1 tsp of Cornstarch
  • 1/8 tsp of White Pepper
  • 1 tsp of Sesame Oil
  • 2 tbsp of Water
  • 1 small diced Onion
  • 2 cloves of minced Garlic
  • 2 cups frozen Green Peas
  • 1 tbsp of Oil (neutral tasting oil such as Canola or Vegetable)
  • 2 tbsp of Oyster Sauce
  • 1 sliced Green Onion for garnish
  • 1 Egg
  • Steamed Rice

Preparation

  1. Marinate beef with soy sauce, sugar, cornstarch, white pepper, sesame oil and water for at least 30 minutes.
  2. If you marinate the beef in the fridge, make sure you bring it back to room temperature before cooking it.
  3. Heat oil in a wok or a large frying pan.
  4. Sauté the onions until they are translucent (about 5 minutes) and then add garlic in.
  5. Add beef to the onions and garlic and cook until it is done.
  6. Stir in oyster sauce.
  7. If sauce doesn’t thicken after adding the oyster sauce, thicken with cornstarch solution (mix 1 tsp. cornstarch and 1 tbsp. water in a bowl first then add it into the beef mixture).
  8. Lastly, add peas in the mixture and cook until peas are heated through.
  9. Put beef mixture on a bed of steamed rice.
  10. Crack and stir the raw egg into the rice dish.
  11. Garnish with sliced green onions.

Notes

Note #1: If the beef is too fatty, you might want to drain the fat after cooking before putting the mixture on the rice.

Note #2: If you are squeamish about using a raw egg, you can always cook it sunny side up or over easy. If you are using the raw egg, make sure you wash the shell thoroughly.

https://www.memorabledishes.com/minced-beef-and-egg-with-rice/

Chicken Crunchy Chow Mein

Chicken Crunchy Chow Mein

Who doesn’t love crunchy chow mein that you order from Chinese take out restaurants? It’s deceiving how fattening those skinny crunchy noodles are. Believe it or not, they are deep fried. I know – shocking isn’t it?

I for one, LOVE the crunchy chow mein that I order from Chinese restaurants. The meat and sauce on top of those crunchy noodles – It’s a perfect sensation in your mouth when biting into the saucy part of the noodles combined with the crunchy part.

This Chicken Crunchy Chow Mein is definitely one of my favourite memorable go-to dishes. Super-easy, super-delicious, and super-impressive! I’ve made it for my own parties and brought it as a potluck dish to friends’ houses.

I wanted to create super crunchy noodles without the added fat. So I figured out baking the noodles with a little bit of oil can create the same effect. Here, I will show you how I make it. This is my secret passed onto you 😉 Your friends and family will be impressed that you can create restaurant-quality Crunchy Chow Mein from home.

I think this dish could be one of my friends’ most Memorable Dishes of mine. They are always shocked that it’s not bought from a Chinese restaurant. Yes, it’s that good!

Chicken Crunchy Chow Mein

Chicken Crunchy Chow Mein

Prep Time: 30 minutes

Cook Time: 30 minutes

Total Time: 60 minutes

Serving Size: 4-6

Ingredients

  • 2 boneless, skinless sliced Chicken Breasts (approximately 8 oz. each)
  • 1 tbsp of low sodium Soy Sauce
  • 1 tsp Sugar
  • 1 tsp Cornstarch
  • 1 tsp Chinese Cooking Wine (optional)
  • 2 cloves minced Garlic
  • 1 tsp of minced Ginger
  • 2 tbsp of Oyster Sauce
  • ½ cup of Chicken Broth or Water
  • 1 lb Bean Sprouts
  • 1 ½ cup of julienned Carrots
  • 1 ½ cup of julienned Snow Peas or Sugar Snap Peas (trimmed)
  • ½ tsp of Salt
  • 1 Package Egg Noodles
  • Vegetable Oil (2 tbsp for noodles, 2 tsp for vegetables, 2 tsp for chicken)
  • 2 tsp Cornstarch
  • 2 tbsp Water

Preparation

  1. Marinate chicken with soy sauce, sugar, cornstarch, and cooking wine for at least 30 minutes in refrigerator.
  2. For Noodles Preparation
  3. Preheat oven to 400°F.
  4. Put egg noodles in a large stainless steel bowl.
  5. Boil enough water to cover the noodles in the bowl.
  6. Once the water is boiled, pour it on the noodles.
  7. Loosen the noodles with a fork and let them sit for 1 minute.
  8. Drain noodles out thoroughly with a colander and pat dry with paper towel.
  9. Line baking sheet with parchment paper.
  10. Spread 1 tbsp of vegetable oil on the bottom of the lined baking sheet.
  11. Put noodles on oiled baking sheet.
  12. Then pour another 1 tbsp of vegetable oil on top of the noodles and mix.
  13. Bake for 10-15 minutes then flip the noodles over and bake it for another 10-15 minutes. (It depends on how crunchy you want them. I like them extra crunchy 🙂
  14. Set aside.
  15. For Vegetables and Chicken Preparation
  16. Heat 2 tsp of oil in wok or large frying pan.
  17. Fry up carrots and cook for a few minutes, then add snow peas and lastly the bean sprouts.
  18. Cook vegetables until tender but still have their crunch.
  19. Set vegetables aside.
  20. Using the same wok/frying pan, heat 2 tsp of oil and sauté the minced garlic and ginger.
  21. Add marinated chicken to the wok and cook until chicken is done.
  22. Add chicken broth/water and oyster sauce.
  23. Add vegetables back into the wok/frying pan and cook until everything is mixed in.
  24. Scoop chicken and vegetable mixture onto the crunchy noodles and leave liquid in the wok/frying pan.
  25. Mix 2 tsp of cornstarch with 2 tbsp of water into a small bowl.
  26. Then pour cornstarch mixture into sauce until thickens.
  27. Pour the rest of the sauce onto noodles & meat mixture.
https://www.memorabledishes.com/chicken-crunchy-chow-mein/
Chicken Crunchy Chow Mein - 3 pix

Tomatoes Stuffed With Ham Salad

Tomatoes Stuffed With Ham Salad

Even though I spent the first eight years of my life in Hong Kong, my childhood Memorable Dishes could easily have come from a child in North America. The British influences in Hong Kong have added a plethora of interesting dishes to the Hong Kong people. Because of my mom’s adventurous nature in the culinary world, my childhood dishes were made up of both Chinese and Western dishes.

One of my most fondest memories was our weekend potluck parties with friends and family. These weekend gatherings consisted of lots of yummy food coupled with mahjong games for the adults. The kids were left to their own devices while the adults played mahjong. I don’t know why we had so much fun playing even though Hong Kong apartments were fairly small.

When we got hungry from playing, we would grab these stuffed tomatoes and pop them into our mouths. Well, maybe not pop them but took a couple of big bites. At that time, neither cherry nor cocktail tomatoes were available in Hong Kong so my mom used the smallest tomatoes she could find to make these delicious snacks.

I just found out from my mom that she used butter in this recipe. No wonder why they tasted so good! I am recreating this dish using small vine-ripened cocktail tomatoes. Feel free to use cherry tomatoes if you want them to be more bite-sized.

Tomatoes Stuffed With Ham Salad

Tomatoes Stuffed With Ham Salad

Prep Time: 30 minutes

Total Time: 30 minutes

Ingredients

  • 12 Cocktail Tomatoes (ripe but firm)
  • 1 cup diced Ham
  • 3 tbsp Mayonnaise
  • 1 tsp of melted Butter (Use if you want to keep it the old school way. Omit if you are more health conscious 🙂
  • A few dashes of White Pepper
  • Parsley for garnish (optional)

Preparation

  1. Cut the top of the tomatoes big enough to scoop out the seeds. Scoop and discard the seeds.
  2. Cut a bit off the bottom of the tomatoes so that the tomatoes can stand up.
  3. Turn the hollowed out tomatoes open-side down so you can drain the extra juice out.
  4. Mix ham, mayonnaise, butter (if using).
  5. Fill tomatoes with ham mixture.
  6. Garnish with parsley if using.

Notes

Note #1: If you can’t find cocktail tomatoes and end up using bigger tomatoes, you can cut bigger tomatoes in half instead.

Note #2: You can prep this a few hours ahead and leave it in the fridge. When you are ready to serve, scoop the ham mixture into the tomatoes.

https://www.memorabledishes.com/tomatoes-stuffed-with-ham-salad/

Inspiration for Writing Memorable Dishes

After having my second child, I quit my full-time job as a multimedia/web graphics/design person to take care of my family. When I started taking culinary classes at George Brown College and posting food pictures on Facebook, people suggested that I write a blog. At that time, I wasn’t too keen on the idea. Part of the reason I pursued cooking was to do something that I was passionate about. But also to do something more social rather than sitting in front of the computer all day.

Nevertheless, my view on writing a blog has since changed. On one particular day, I was browsing through the food section of the library. I usually look through that section to see which cookbooks interest me. Not only were there recipe-oriented books, but there were also food-related books that were not cookbooks. The first book I picked up was Sweet Mandarin: The Courageous True Story of Three Generations of Chinese Women and Their Journey from East to West by Helen Tse. It is a very heart-warming story about three generations of women and their journeys through life that are somehow, intertwined by food. I was very touched by their story. Reading Tse’s book inspired me to write a blog that is connected by food but meaningful as well. The idea of Memorable Dishes was conceived!

I have combined my passion for cooking, my experience in graphics (and being a fairly tech-savvy person) to create this blog. In between taking care of my family, culinary classes, working part-time from home, volunteering at my kids’ school, and having our third child, it has been a year since the idea came into fruition. Finally, I am ready to launch my blog. Hope you enjoy reading it and that you recollect your own Memorable Dishes you’ve eaten or created!

img_Inspiration

Show Buttons
Hide Buttons